
In this tutorial, I will guide you on how to upload your plugin to WordPress plugin directory.
As of this moment, there are currently around 54K+ plugins in the directory. Even though there is a vast number of plugins to choose from there are still instances that the functionality that you are looking for is not listed there and currently unavailable.
This makes it hard for non-developers that sometimes they will need to hire a developer just to have a certain functionality that they desire.
For developers, the WordPress plugin directory is the best place to host your own plugin. This can be a help to contribute to the WordPress community and a great exposure for your own works.
Just make sure that your plugin is needed and unique and it will become click.
What you’ll need:
- A WordPress plugin created by yourself.
- A wordpress.org account. (You can register here.)
- TortoiseSVN installed on your computer or any SVN software. (You can download it here.)
- Don’t have a plugin yet? You might be interested to read How to create a WordPress plugin.
Step 1: Create a readme.txt
The readme.txt file is the second most important file next to the code file in submitting your WordPress plugin. It holds information from basic to the detailed description of your plugin.
This file makes it easier for users to identify what does your plugin do and decide whether your plugin is worth downloading.
In short, this is where you market your plugin to the users.
1
2
3
4
5
6
7
8
9
10
11
12
13
14
15
16
17
18
19
20
21
22
23
24
25
26
27
28
29
30
31
32
33
34
35
36
37
38
39
40
41
42
43
44
45
46
47
48
49
50
51
52
53
54
55
56
57
58
59
60
61
62
63
64
65
66
67
=== Posts Unique View Counter ===
Contributors: dcangulo
Donate link: https://www.paypal.me/dcangulo
Plugin Name: Posts Unique View Counter
Plugin URI: https://www.davidangulo.xyz/wp/portfolio/posts-unique-view-counter/
Tags: post, views, counter, hits, analytics, post counter, post hits, post views
Author URI: https://www.davidangulo.xyz/wp/
Author: David Angulo
Requires at least: 4.8.5
Tested up to: 4.9.4
Version: 1.1
Stable tag: trunk
License: GPLv2 or later
License URI: https://www.gnu.org/licenses/gpl-2.0.html
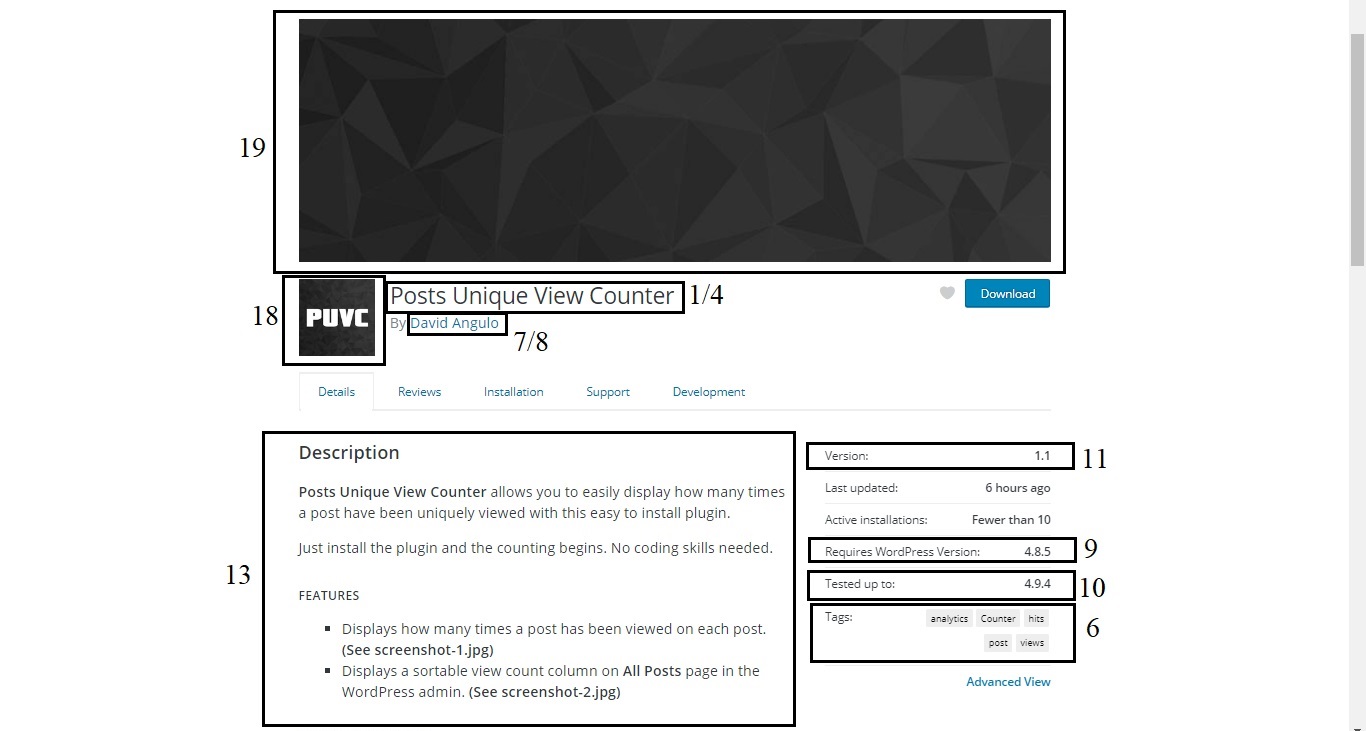
Upon activation, it will allow you to easily display how many times a post have been uniquely viewed.
== Description ==
<strong>Posts Unique View Counter</strong> allows you to easily display how many times a post have been uniquely viewed with this easy to install plugin.
Just install the plugin and the counting begins. No coding skills needed.
<h4>FEATURES</h4>
<ul>
<li> Displays how many times a post has been viewed on each post. <strong>(See screenshot-1.jpg)</strong></li>
<li> Displays a sortable view count column on <strong>All Posts</strong> page in the WordPress admin. <strong>(See screenshot-2.jpg)</strong></li>
</ul>
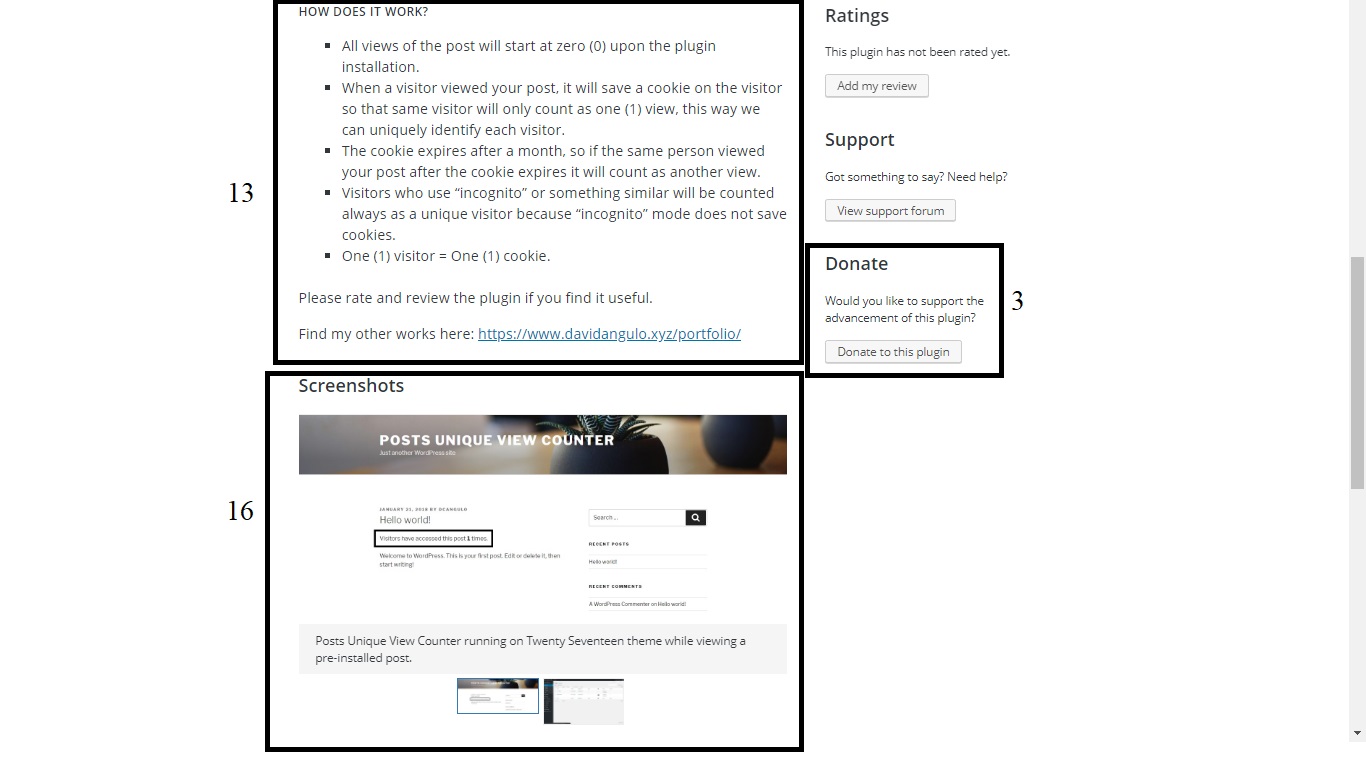
<h4>HOW DOES IT WORK?</h4>
<ul>
<li> All views of the post will start at zero (0) upon the plugin installation.</li>
<li> When a visitor viewed your post, it will save a cookie on the visitor so that same visitor will only count as one (1) view, this way we can uniquely identify each visitor.</li>
<li> The cookie expires after a month, so if the same person viewed your post after the cookie expires it will count as another view.</li>
<li> Visitors who use "incognito" or something similar will be counted always as a unique visitor because "incognito" mode does not save cookies.</li>
<li> One (1) visitor = One (1) cookie.</li>
</ul>
Please rate and review the plugin if you find it useful.
Find my other works here: <a href="https://www.davidangulo.xyz/wp/portfolio/" target="_blank">https://www.davidangulo.xyz/wp/portfolio/</a>
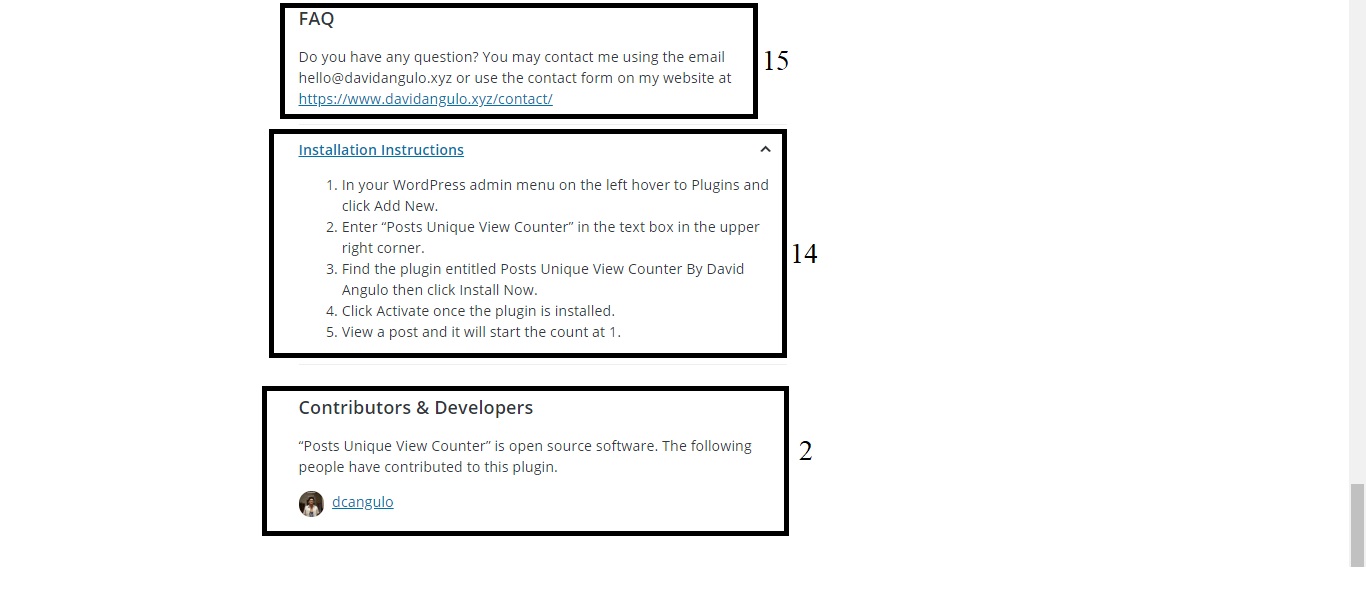
== Installation ==
1. In your WordPress admin menu on the left hover to Plugins and click Add New.
2. Enter "Posts Unique View Counter" in the text box in the upper right corner.
3. Find the plugin entitled Posts Unique View Counter By David Angulo then click Install Now.
4. Click Activate once the plugin is installed.
5. View a post and it will start the count at 1.
== Frequently Asked Questions ==
Do you have any question? You may contact me using the email [email protected] or use the contact form on my website at <a href="https://www.davidangulo.xyz/wp/contact/" target="_blank">https://www.davidangulo.xyz/wp/contact/</a>
== Screenshots ==
1. Posts Unique View Counter running on Twenty Seventeen theme while viewing a pre-installed post.
2. Posts Unique View Counter sortable view count column in the All Posts page.
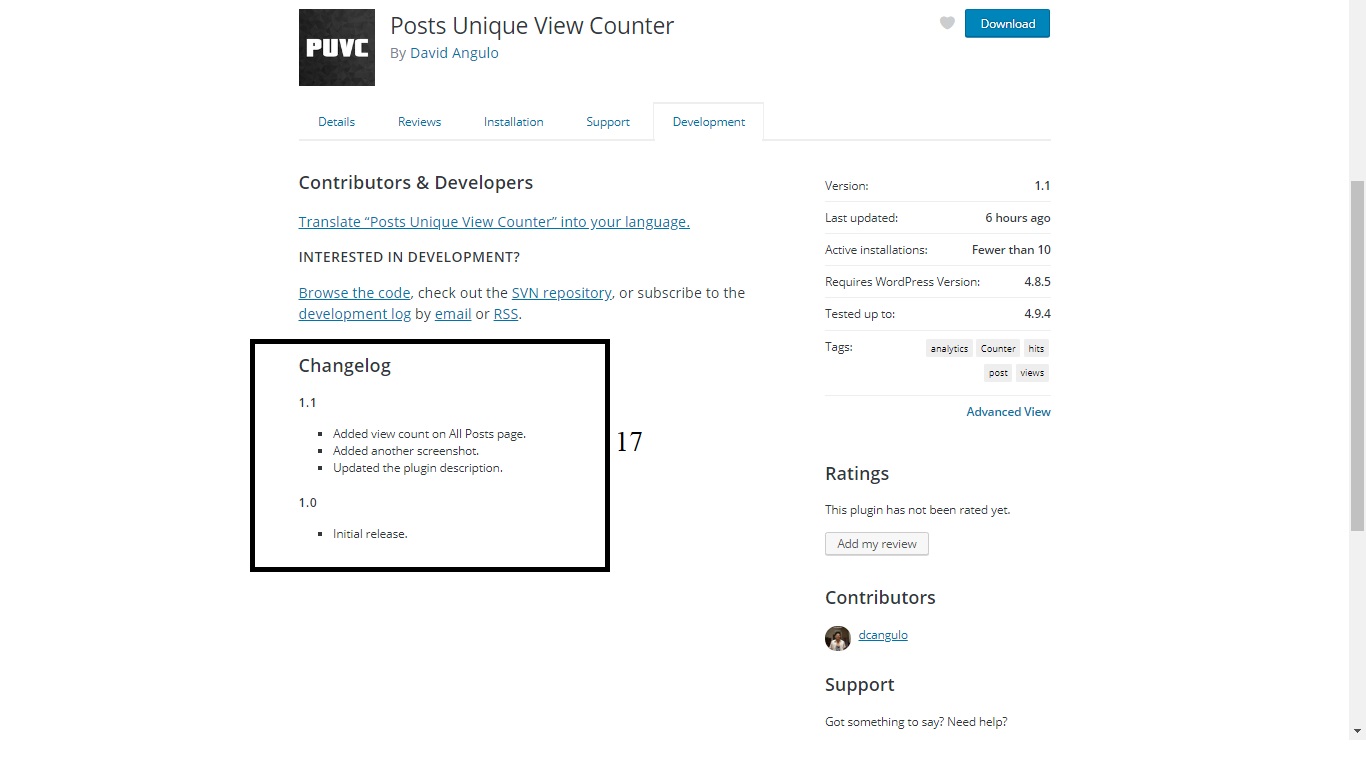
== Changelog ==
= 1.1 =
* Added view count on All Posts page.
* Added another screenshot.
* Updated the plugin description.
= 1.0 =
* Initial release.
The readme.txt above is what I use in my plugin Posts Unique View Counter.
- The first line is where you will put your plugin name for this example the plugin name is Posts Unique View Counter.
- Contributors are the username of the contributors for the development of this plugin. If you have more than one, you can separate it with commas.
- The donate link is the link where can you receive donations.
- The plugin name should be the same as number one (1).
- The plugin uri is a valid url where they can see detailed information about your plugin.
- Tags are simply tags. Put the words you think that is related to your plugin.
- The author uri is a valid link to the author page, you can put your own website or maybe your wordpress.org profile.
- Author name is simply the name of the author.
- Requires at least is the minimum version of WordPress required for your plugin.
- Tested up to is the version of WordPress that you have tested it.
- The version number is simply the number of versions. If you are just starting you can set it to 1.0, 1.0.0 or maybe alpha.
- The stable tag is the version number that you can consider as stable.
You can just copy the license in here because one of the terms you have to follow when uploading your plugin is that its license must be GPL compatible.
The next is simply a short description of your plugin.
- Then on the == Description == tag. Under it is the detailed information of your plugin. You can use HTML tags in here.
- The == Installation == is your instructions on how to install your plugin correctly.
- You can put Q&A in the == Frequently Asked Questions == if you have any of the users will not need to repeat questions that have been answered before.
- == Screenshots == is the caption that will appear on your screenshots, it is matched by the number.
- And finally, the == Changelog == is where you will put the changes for every version.
- Icon.
- Banner.
 Picture 1.1. Screenshot 1.
 Picture 1.2. Screenshot 2.
 Picture 1.3. Screenshot 3.
 Picture 1.4. Screenshot 4.
Step 2: Create an icon and a banner.
The icon and the banner will be displayed when it is approved in the directory.
The icon must be .jpg or .png and it is named in this format icon-128×128.jpg and icon-256×256.jpg it is better to have both of them. It must have a dimension of 128x128px and 256x256px respectively.
Same with the banner must be .jpg or .png and named banner-772×250.jpg and has a dimension of 772x250px.
If you ever have a screenshot it must also be .jpg or .png and a has a filename of screenshot-1.jpg, screenshot-2.jpg and so on. The caption that will be shown for this is in number sixteen (16).
Step 3: Zip the plugin file and the readme.txt
The zip file should look like this.
1
2
3
4
5
your-plugin-name.zip
|--your-plugin-name-folder
--|--your-plugin-file1.php
--|--your-plugin-file2.php
--|--readme.txt
Inside the zip archive is a folder with the plugin name with no whitespaces (use dashes) then, inside the folder is your files.
Step 4: Submit your plugin for review.
Go to this link and upload the zip file you have created.
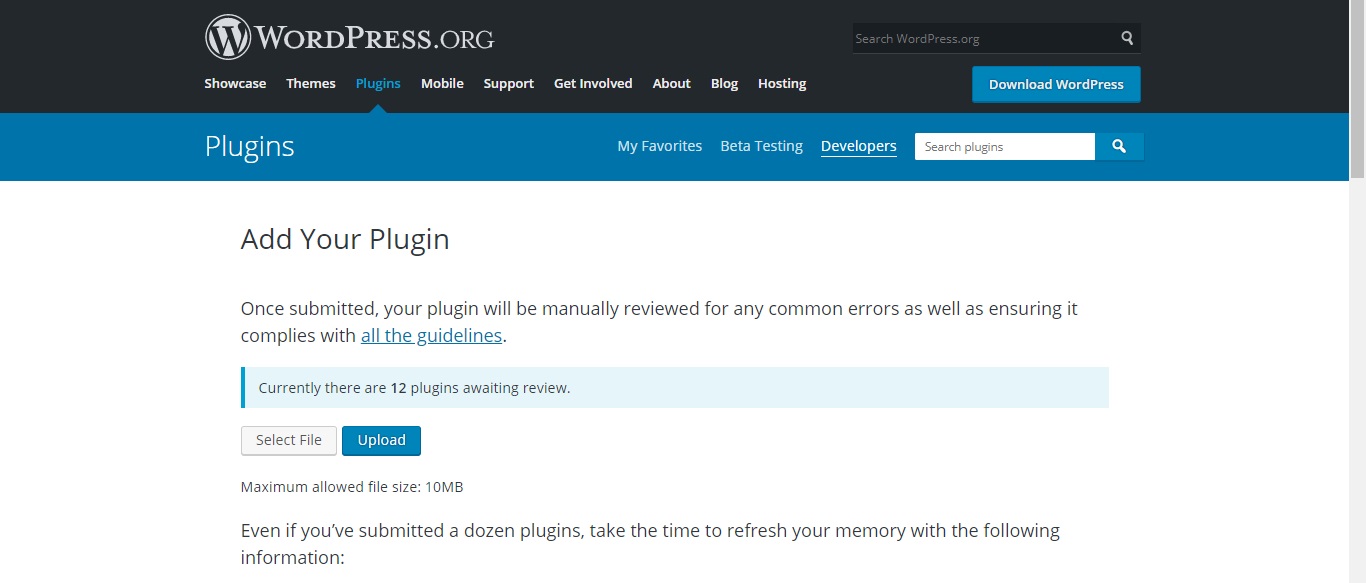 Picture 4.1. Add your plugin.
 Picture 4.2. Pending request.
Step 5: Save your SVN repository link.
If your plugin is approved, then you will receive a congratulatory message containing your SVN repository link.
The link looks like this https://plugins.svn.wordpress.org/your-plugin-name.
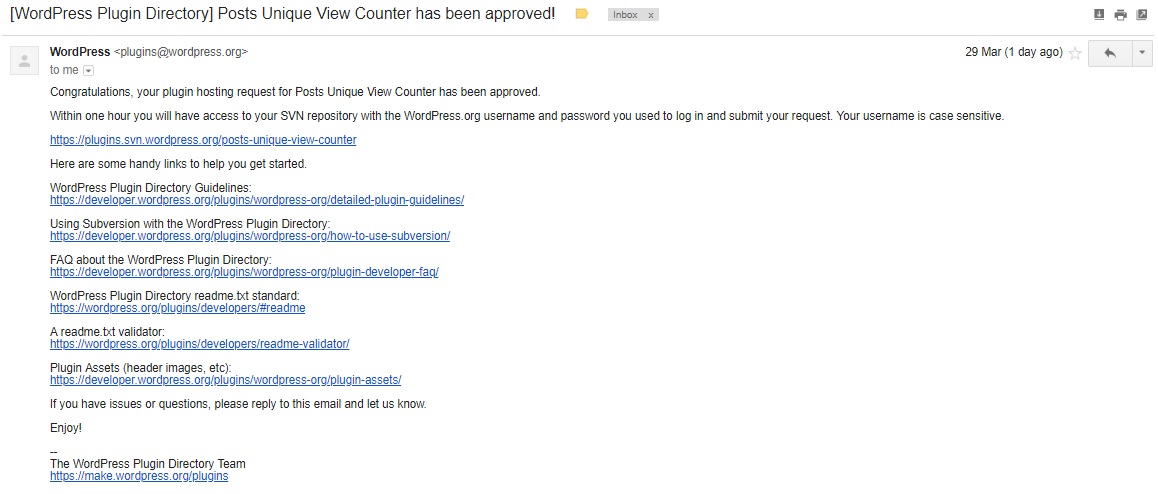 Picture 5.1. Congratulatory message.
Step 6: Upload your plugin to the SVN repository.
Open your TortoiseSVN Repository browser and enter your SVN repository link.
You should see four (4) directories.
1
2
3
4
assets/
branches/
tags/
trunk/
The assets folder should contain the graphics for your plugin. You should upload the icon-128×128.jpg, icon-256×256.jpg, banner-772×250.jpg, screenshot-1.jpg, and the other screenshots if any.
The branches folder is like a playground where you can do testing of your code before releasing it.
The tags folder is like a folder for different versions of your plugin, just in case, your update fails then you can restore your plugin to the previous version uploaded in the tags’ folder.
The trunk folder is the live version of your plugin. This is where you will upload your plugin files together with your readme.txt file. The files you have submitted for review should be uploaded here.
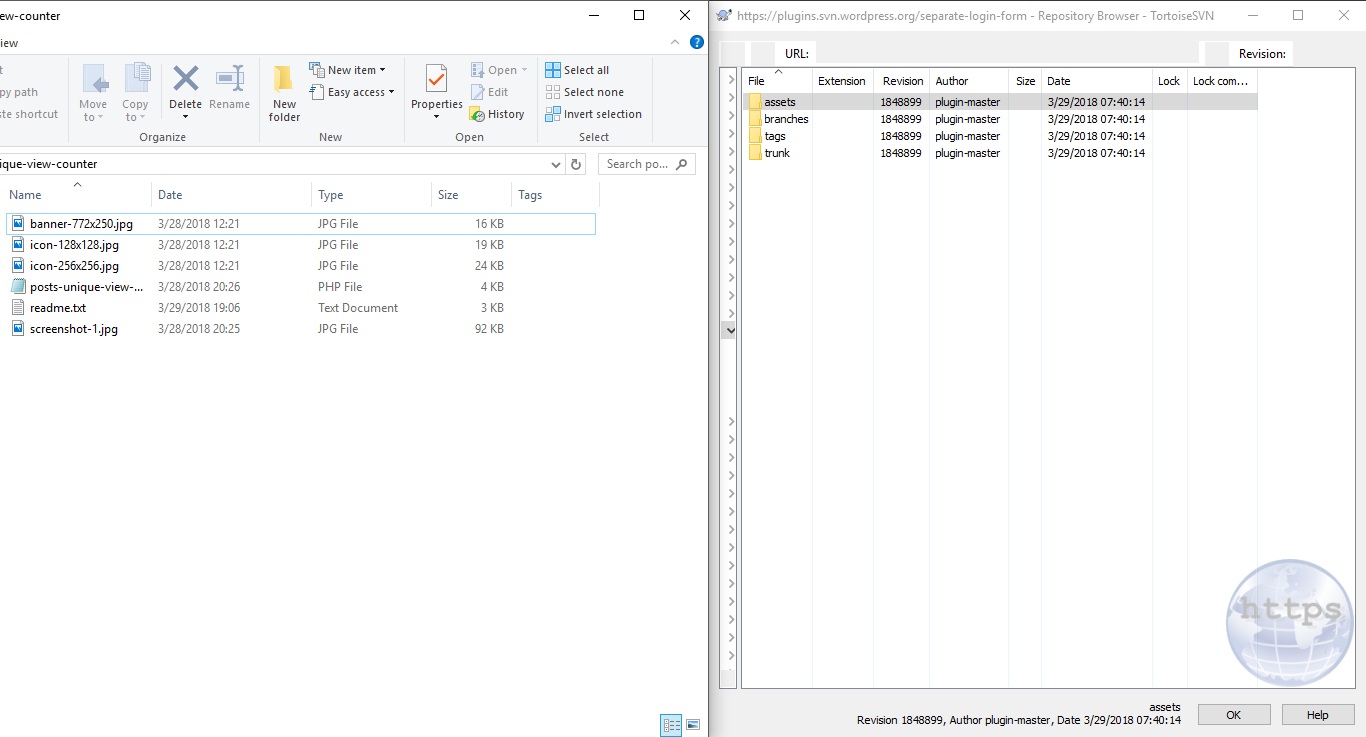 Picture 6.1. Plugin files (left), svn repository (right)
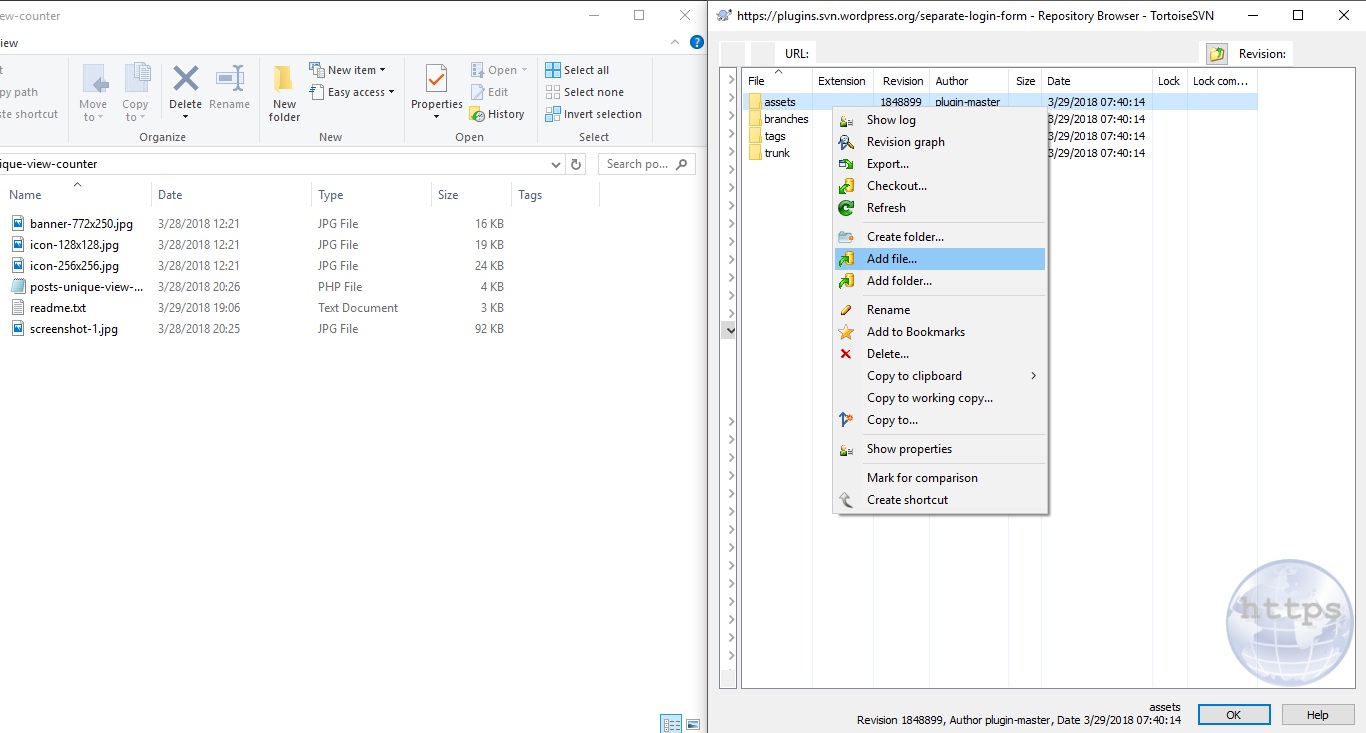 Picture 6.2. File Upload.
Right-click to the folder and click Add file to upload your file.
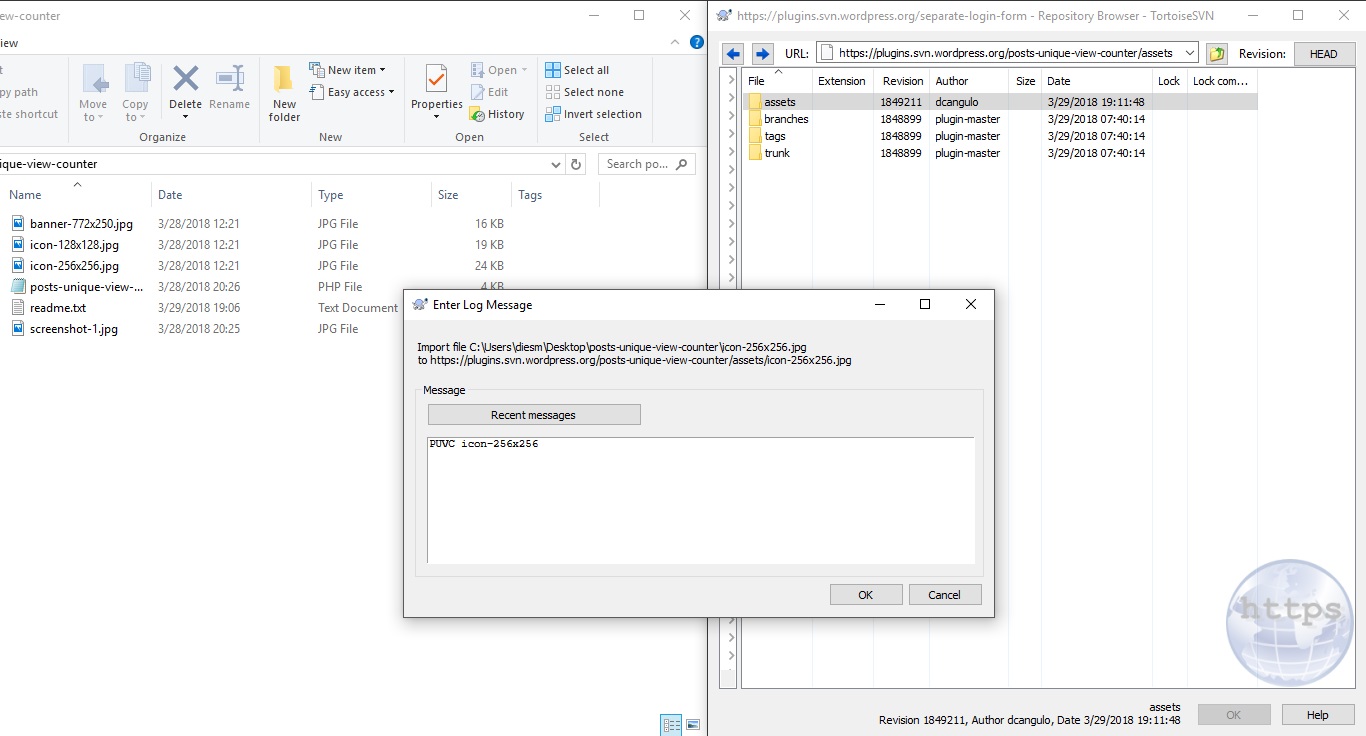 Picture 6.3. Enter a description for every file you upload.
That’s it, just make sure that you upload your file to the right directory and it should reflect almost immediately if you search for your WordPress plugin in the directory.