
This tutorial will guide you on how to set up Cloudflare on WordPress and how CDN makes your site load faster and more secured through SSL technology on your WordPress website.
Step 1: Setup your site to Cloudflare.
If you do not have your site configured to Cloudflare you might want to read our step-by-step tutorial on how to setup Cloudflare CDN to your website. This will thoroughly guide you in setting up your website to Cloudflare.
Step 2: Get a free SSL certificate from Cloudflare.
Applying for an SSL certificate from Cloudflare is easy and it’s free, you may read this tutorial for detailed instructions on how to get free SSL certificate from Cloudflare.
Step 3: Install the Cloudflare plugin.
Hover to Plugins, then click Add New.
On the search box enter the keyword cloudflare.
On the results find the plugin Cloudflare authored by the Cloudflare team and click Install Now.
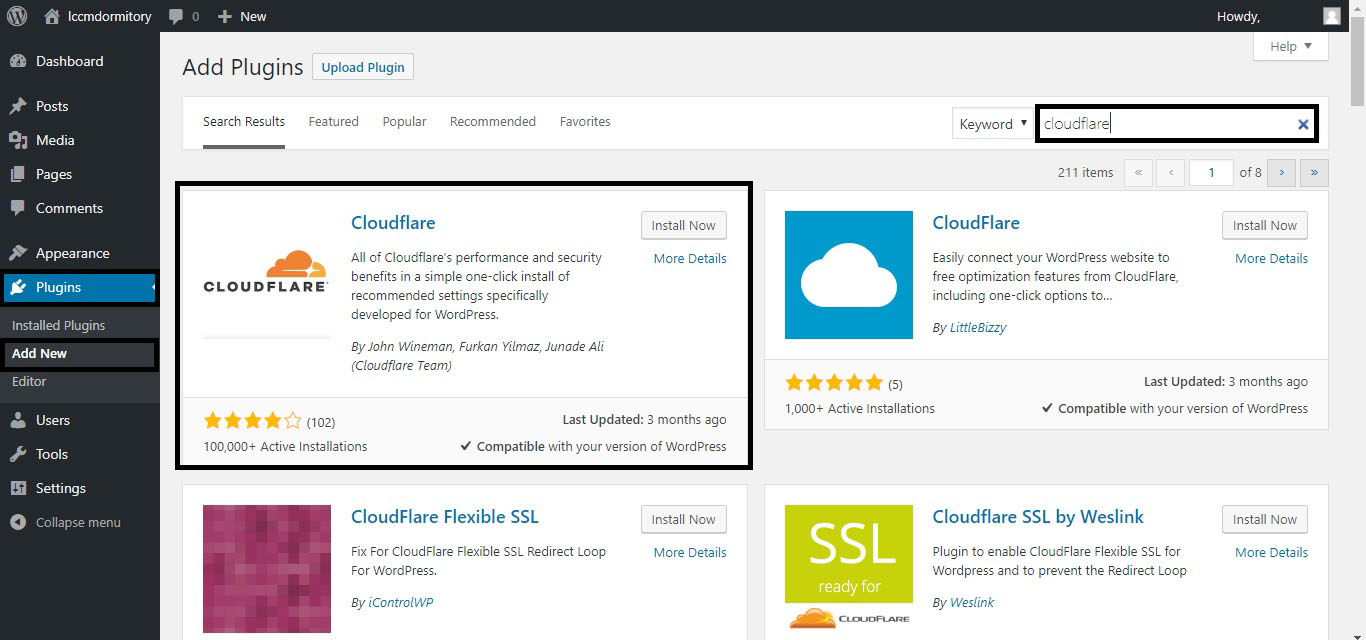 Picture 3.1. Finding and installing the Cloudflare plugin.
Using the same keyword in the search box, you may see the plugin Cloudflare Flexible SSL by iControlWP. Install this plugin also.
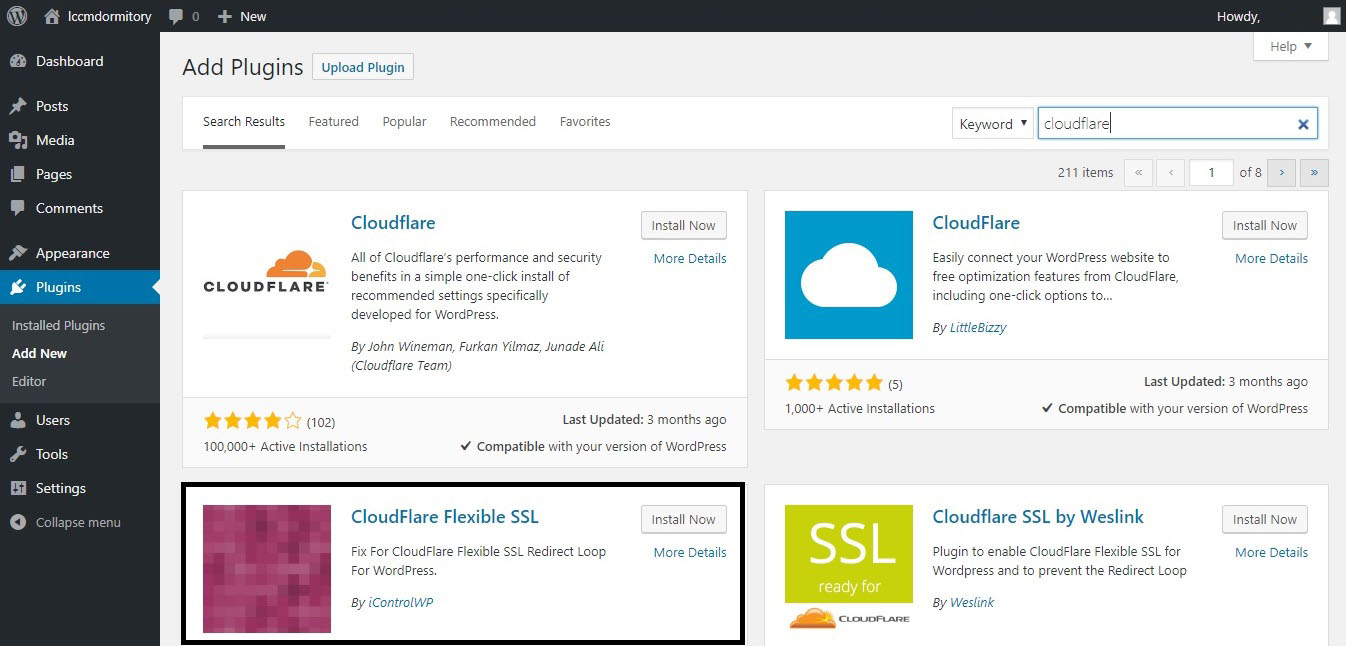 Picture 3.2. Finding and installing the Cloudflare Flexible SSL plugin.
This will allow your WordPress website to be accessed with an https rather than http and it prevents redirection loop from http to https to http and so on.
Step 4: Activate the plugins.
Go to Plugins and make sure that both plugins are activated.
 Picture 4.1. Make sure that both plugins are activated.
Step 5: Configure the Cloudflare plugin.
Hover over Settings, then click Cloudflare.
Since we already have an account as given in Step 1, we would choose Sign in rather than Creating an account.
 Picture 5.1. Cloudflare plugin sign in form.
The email address that is asked was the email address that you have used during the sign-up process in Step 1.
To get your API key, login to your Cloudflare account.
Click on the email address on the upper right then click My Profile.
Scroll down a little, and you will see the View API Key button and click it.
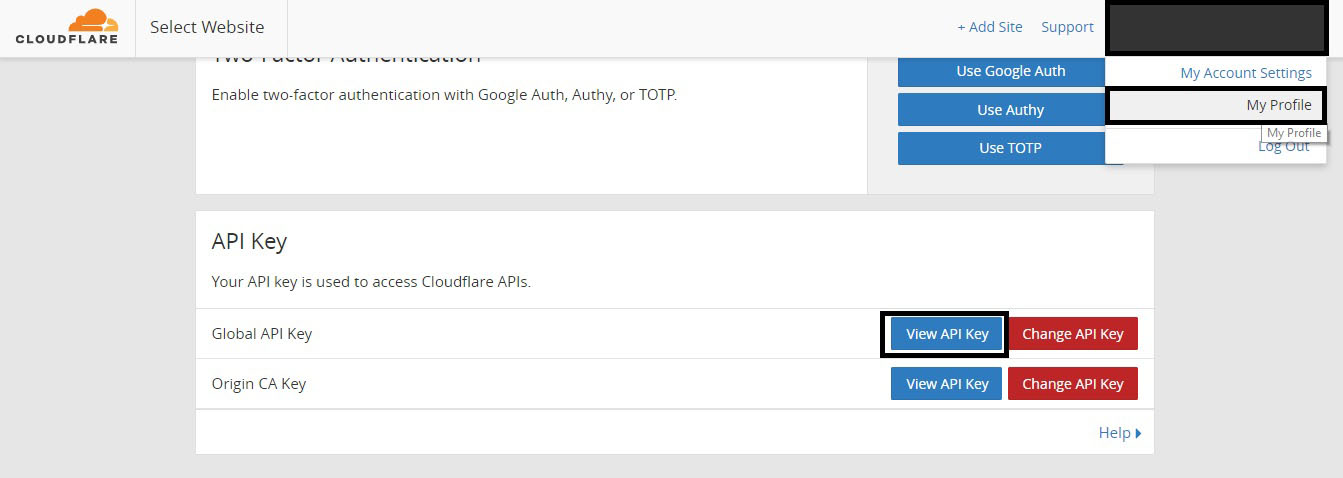 Picture 5.2. Getting your Cloudflare API Key.
You will be prompted for your password, enter your password and copy the text you can see and paste it the API key textbox in your Cloudflare plugin on your WordPress website.
Then click, Save API Credentials.
Your Cloudflare settings will be up to your own preference, but I would recommend that you click Apply on Optimize Cloudflare for WordPress and toggle the Automatic Cache Management to On.
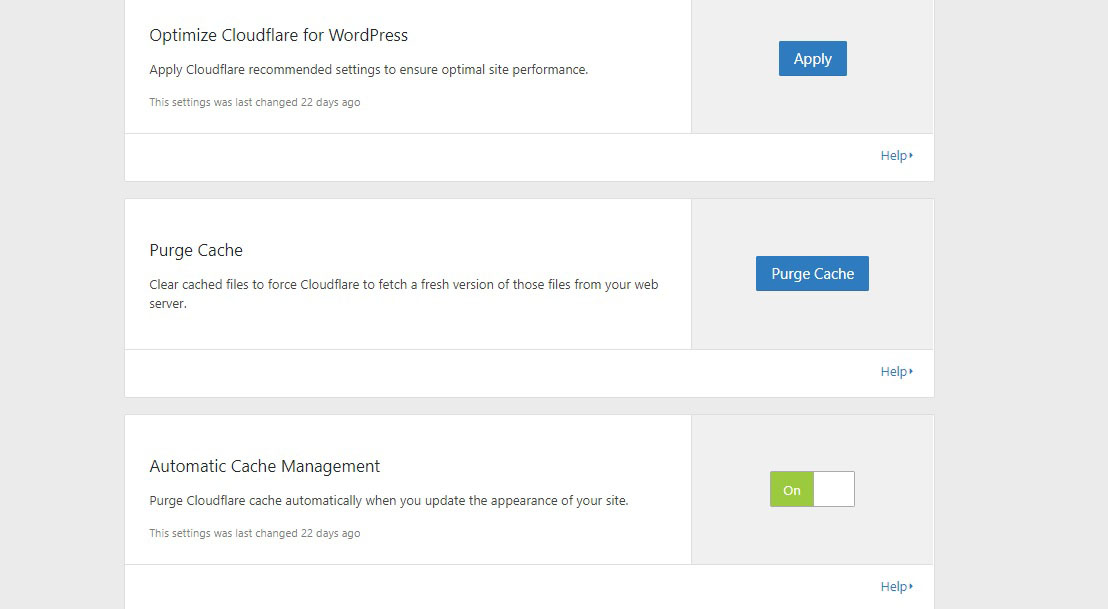 Picture 5.3. My Cloudflare plugin settings.
That’s it, you have successfully configured Cloudflare free CDN and SSL to your website. Just tweak some of the settings and find the best for you.
But we recommend that if you are a heavy user that you upgrade Cloudflare plans to paid version for more options and better performance and security.