
In this tutorial, I’m going to show you how to get a free SSL certificate from Cloudflare. This will turn your website from http to https making it more secure, reliable and more trusted among your users.
What is SSL?
SSL (Secure Sockets Layer) is a standard security used for establishing an encrypted link between a web server and a browser. This ensures that all data passed between the web server and the browser remain private and secured.
Why use SSL?
The main reason to use SSL is to keep sensitive information sent across the internet to remain private and encrypted that only the intended recipient will be able to decode it.
Another reason is that users will completely trust your website especially if it handles sensitive pieces of information such as credit card information.
Step 1: Login to your Cloudflare account.
Head over to the official website of Cloudflare and click Log In in the top menu.
If you don’t have a Cloudflare account yet, you might want to read the tutorial how to setup Cloudflare CDN to your website to setup your website to Cloudflare.
Step 2: Apply for an SSL certificate.
From the overview tab, you should see the menus on the top and click Crypto.
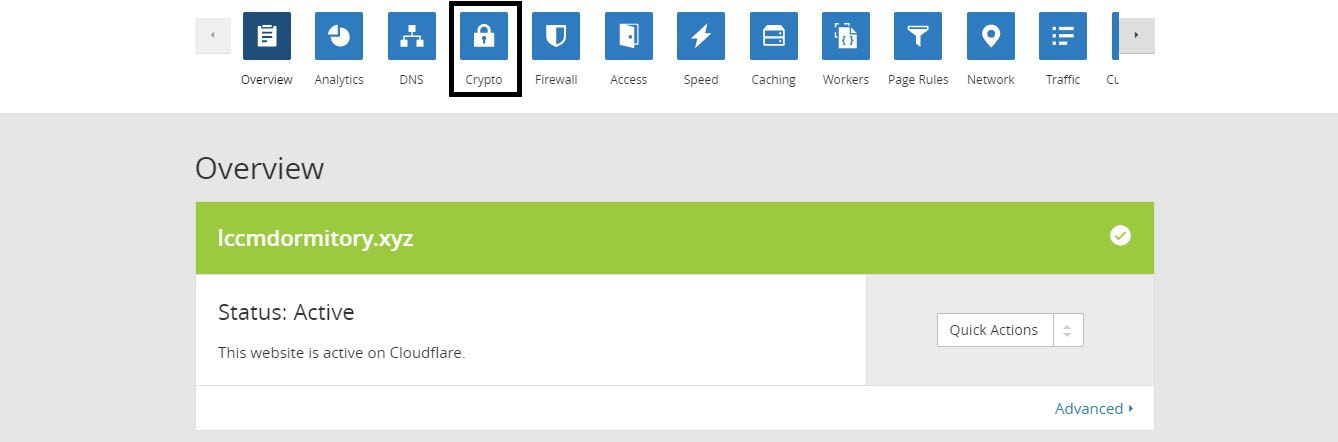 Picture 2.1. Cloudflare Overview
On the SSL menu, select Flexible from the drop-down settings. If you’re applying for the first time this process should take at least 24 hours to be completed.
On this example, we already have a Flexible SSL certificate and it is already active.
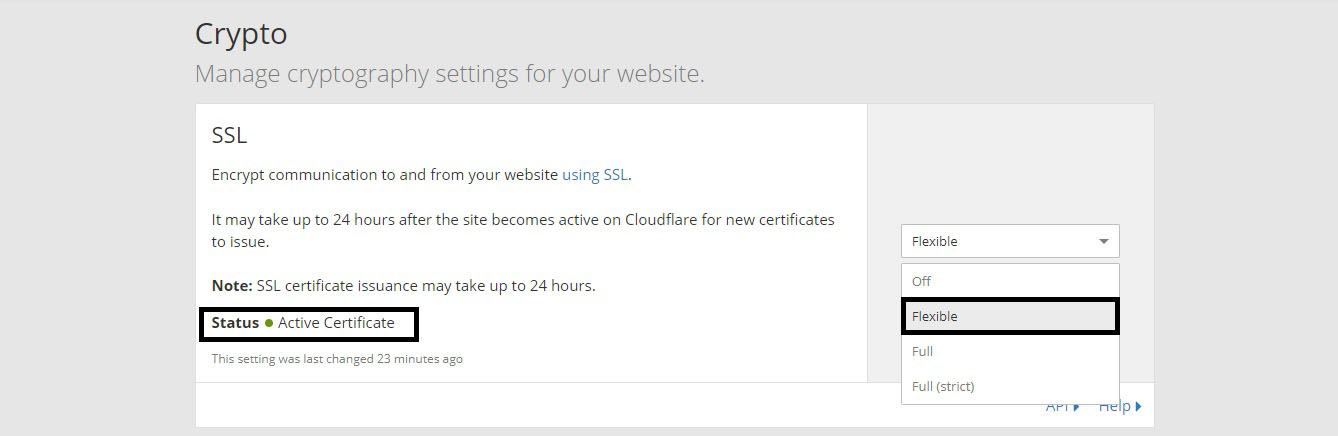 Picture 2.2. Applying for free SSL certificate.
Step 3: Force your website to always use https.
On the menus on the top, click Page Rules.
Click Create Page Rule.
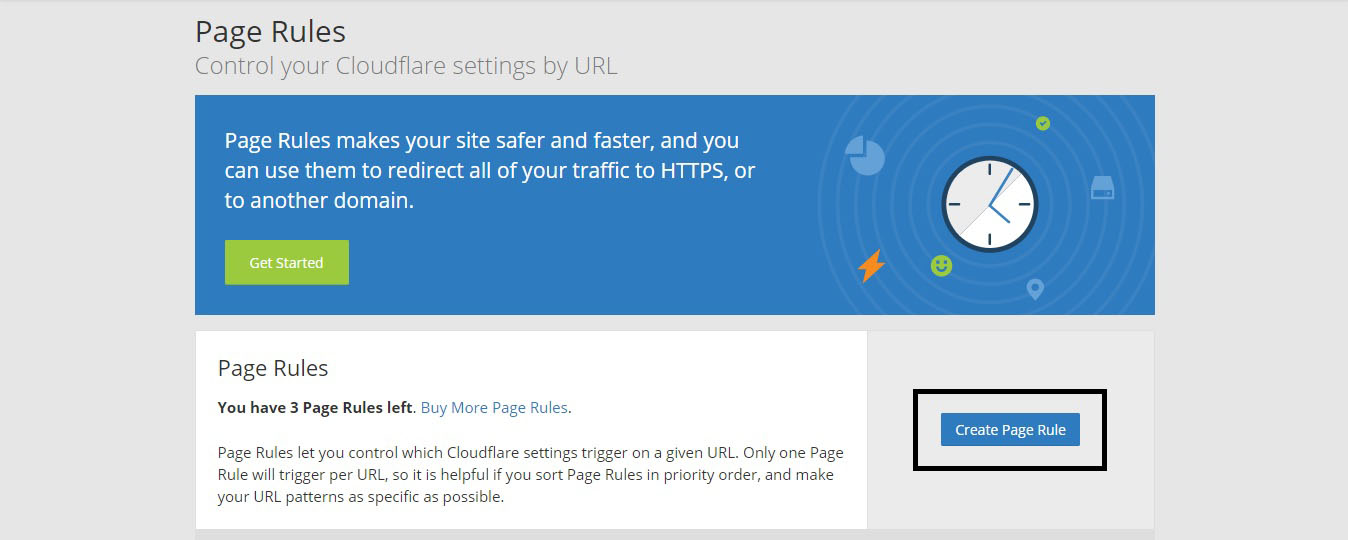 Picture 3.1. Cloudflare Page Rules
On the url textbox enter your domain name with the pattern like I have in the picture.
This is an url pattern that will force all pages on your website to be accessed with https instead of unsecured http.
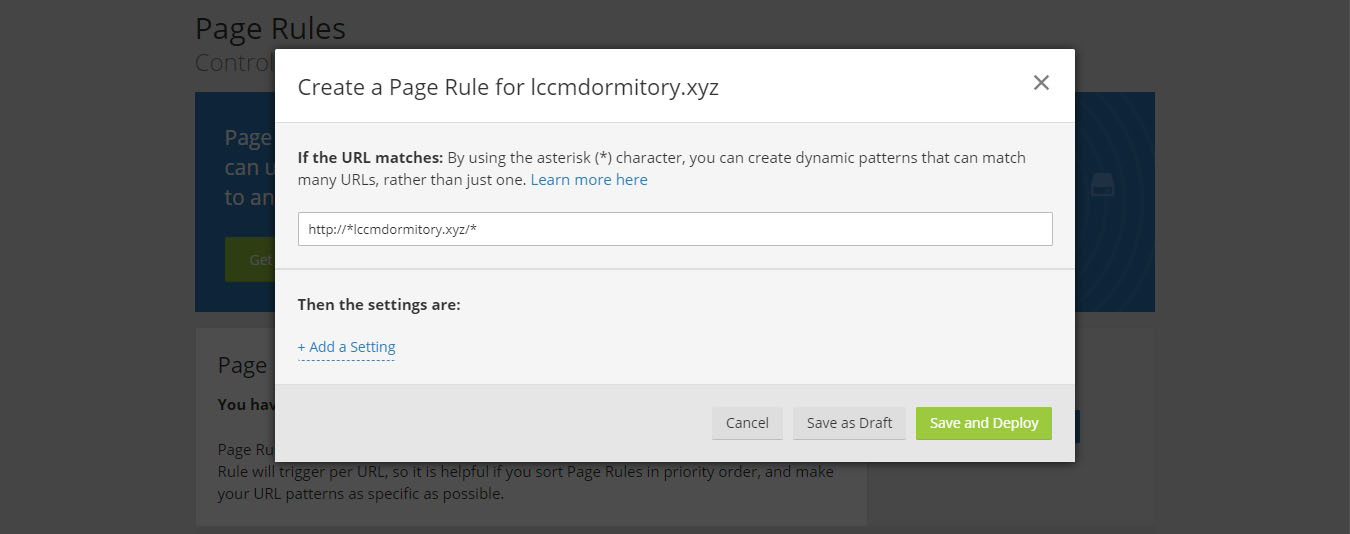 Picture 3.2. Adding a page rule.
On the bottom part, click Add a Setting. From the drop-down menu select Always Use HTTPS then click Save and Deploy.
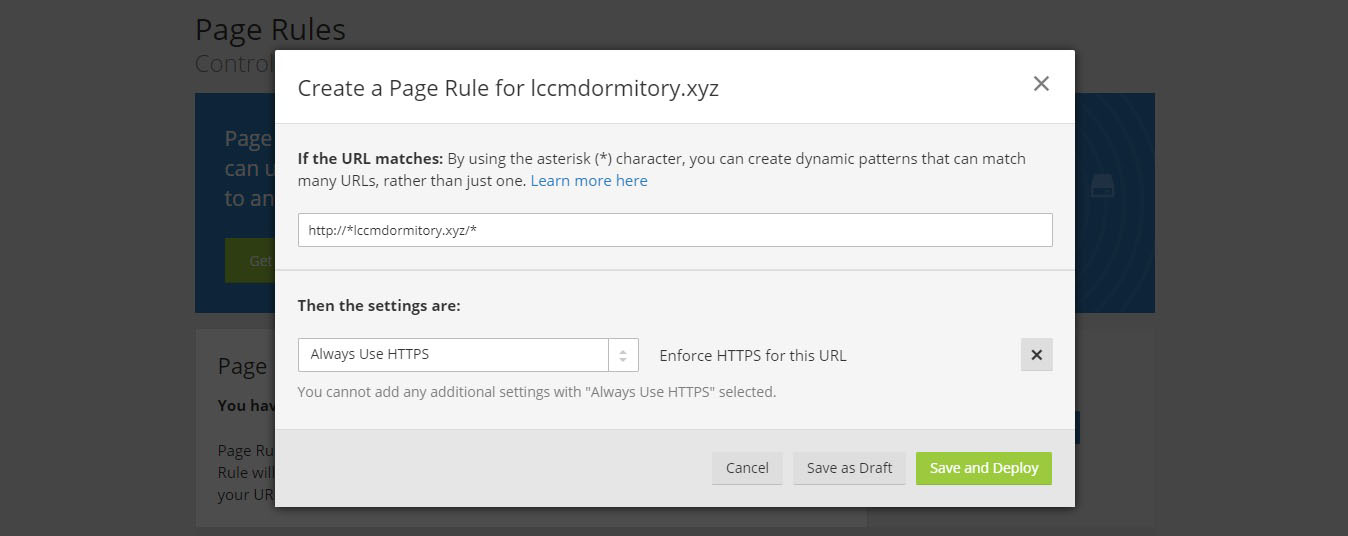 Picture 3.3. Saving the page rule.
Now open your website and you should be able to access it with https and a green lock. If you are getting an error saying that it is not secure. Don’t worry, sometimes it just takes a while for it to be completed.
You should be able to access it with https sooner or later.
 Picture 6.1. Before (Accessing lccmdormitory.xyz from Google Chrome with no SSL certificate)
 Picture 6.2. Before (Accessing lccmdormitory.xyz from Google Chrome with SSL certificate)
If you are not sure if you have configured it correctly you may head to SSL Shopper – SSL Checker and enter your domain name and click Check SSL. You should have a result something like this.
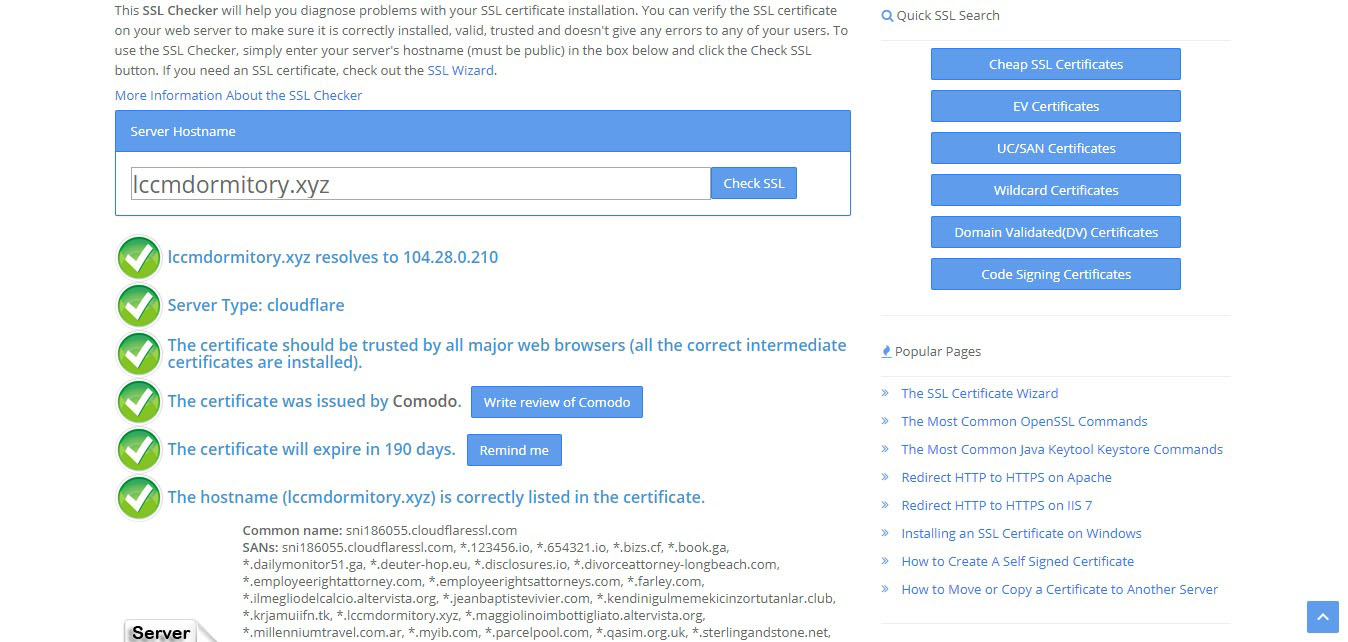 Picture 6.3. SSL Checker by SSL Shopper result.
You can also use this site to check mixed content as page rules is not going to correct it for you. This should help for you to identify what mixed content should be changed.
That’s it, you have now gotten a free SSL certificate from Cloudflare. This should help with encrypting sensitive data on your website.